
Fullscript and Rupa are coming together to support whole-person care in one platform. Once your practice is eligible, you’ll be guided through a short process to move your labs workflow from Rupa to Fullscript.
On Fullscript, you’ll be able to:
- Order labs, recommend supplements, and manage patient care in one place
- Access flexible billing options, phlebotomy services, and real-time order updates
- Use clinical decision support tools to help interpret lab results
Your existing Rupa data will transfer automatically, including order history, upcoming scheduled lab orders, patients, favorites, custom panels, bundles, preferred phlebotomists, results notification preferences, and text snippets. For scheduled orders, you’ll need to re-enter your payment details in Fullscript before the order can be placed on the scheduled date.
Draft orders in Rupa won’t transfer to Fullscript. Complete any draft orders in Rupa before your move, or recreate them in Fullscript after.
This guide walks you through the steps to move your account and finish setting up labs on Fullscript.
Eligibility for moving to Fullscript
Your practice will only be asked to move once the tests, features, and integrations you use on Rupa are available on Fullscript. You’ll be notified when you’re eligible, with a 14-day window to complete the move.
If you don’t take action during your 14-day window, your Rupa account will become view-only, with all information preserved. New orders can then be started on Fullscript, where your existing data will be ready for you to pick up where you left off.
What to expect before your move
To help your practice prepare, we’ll share resources and reminders ahead of your move.
- Prepare with a personalized toolkit. About four weeks before your move window opens, you’ll receive a toolkit tailored to your lab usage, including a practice checklist, a platform comparison, and patient-ready resources.
- Review your account settings. Confirm that your Rupa account details—such as license, NPI, and team member emails—are up to date. If you manage multiple Rupa or Fullscript accounts, decide which Fullscript account will receive your Rupa labs data.
- Continue placing orders through Rupa. Keep placing lab orders on Rupa as usual until you start the move. Any testing already in progress will continue without disruption.
- Watch for your invitation. When your 14-day move window opens, your team will be notified by email and through a banner in your Rupa dashboard. From there, you’ll start the transfer through a short guided process.
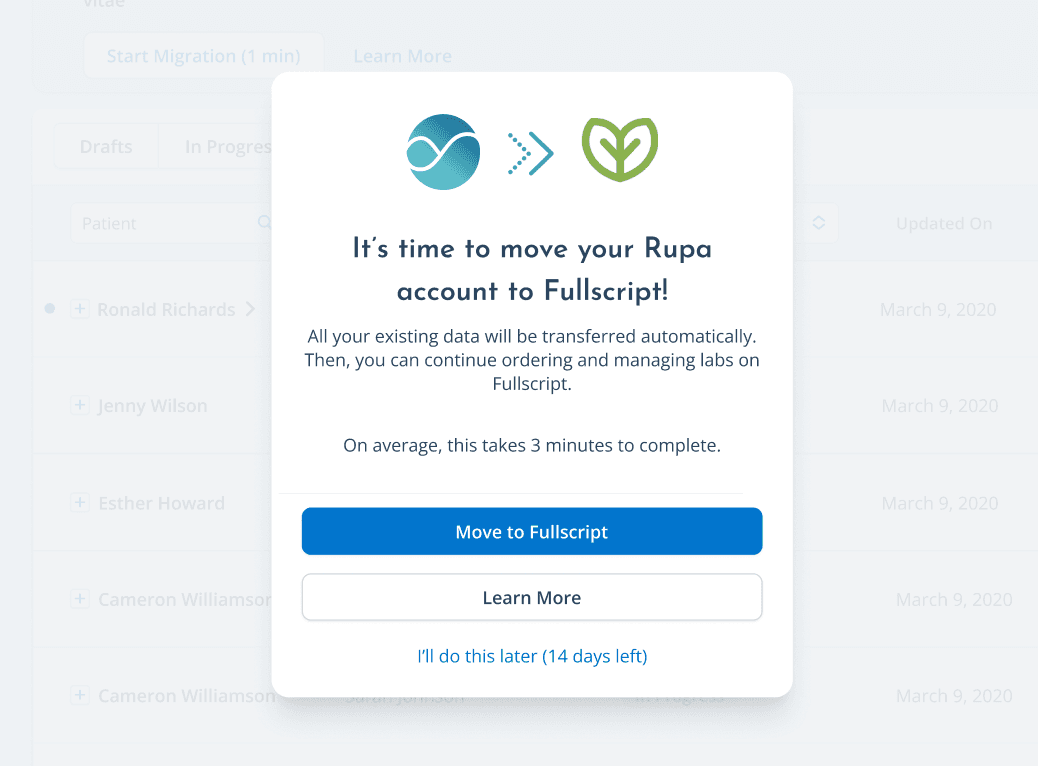
Example of the banner in Rupa notifying you that your move window is open.
For a look at what’s moving with you and where to find and review this data in Fullscript, see Finding Rupa labs data in your Fullscript account.
Move your Rupa account to Fullscript
The steps to move your Rupa account depend on your account type. Choose the tab that matches your setup to begin your move.
Review and match patient accounts
In some cases, you may be asked to review and match patient accounts before your data transfer is complete. This happens when a patient in Rupa has the same email address as a patient in Fullscript, but their name appears slightly different. Reviewing these matches helps make sure patient data is transferred to the correct profile.
To review and match patient accounts:
- On the Moving your patient data to Fullscript screen, click Start.
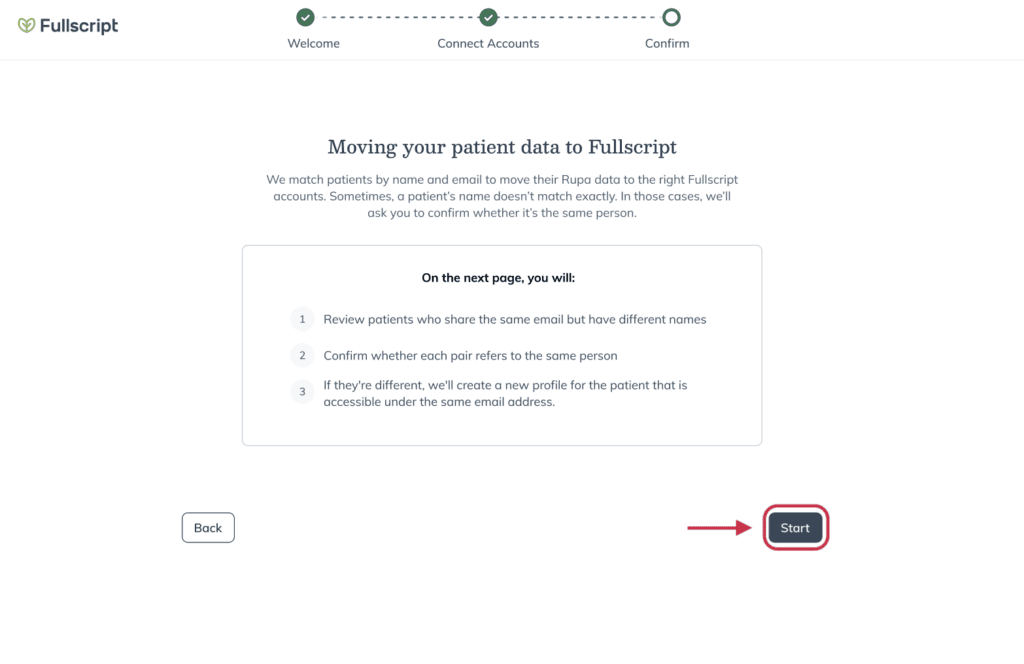
- Compare the patient shown from Rupa with the patient shown in Fullscript.
- For each match, select Same person or Different person.
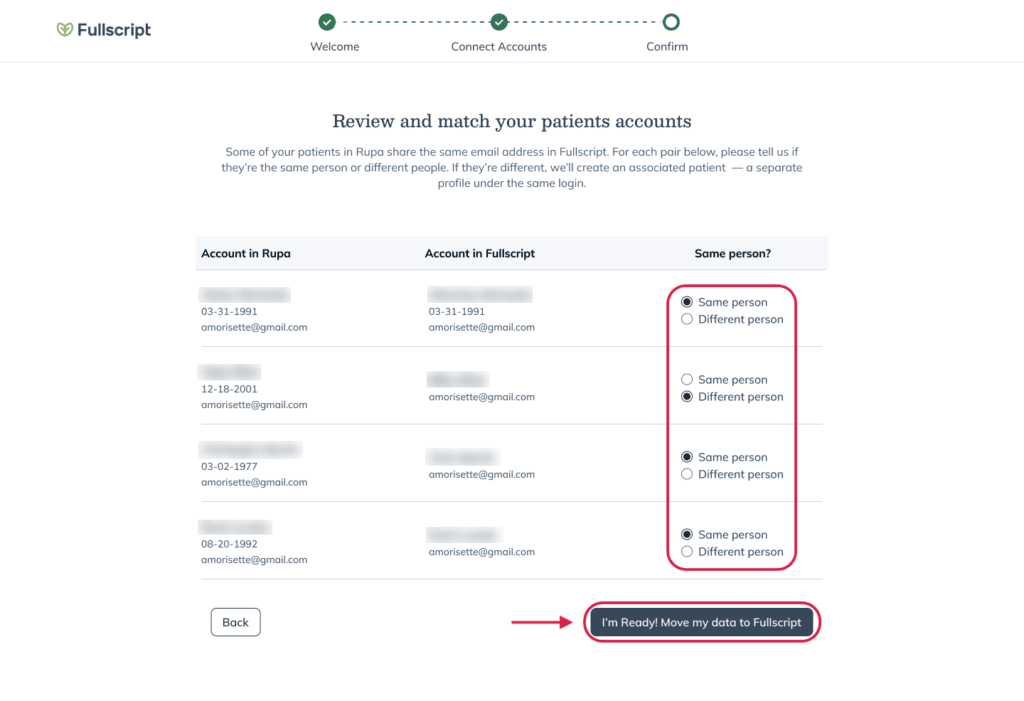
- After reviewing all matches, click I’m Ready! Move my data to Fullscript.
If you select Different person, Fullscript will create a separate patient profile under the same email address.
Complete account setup
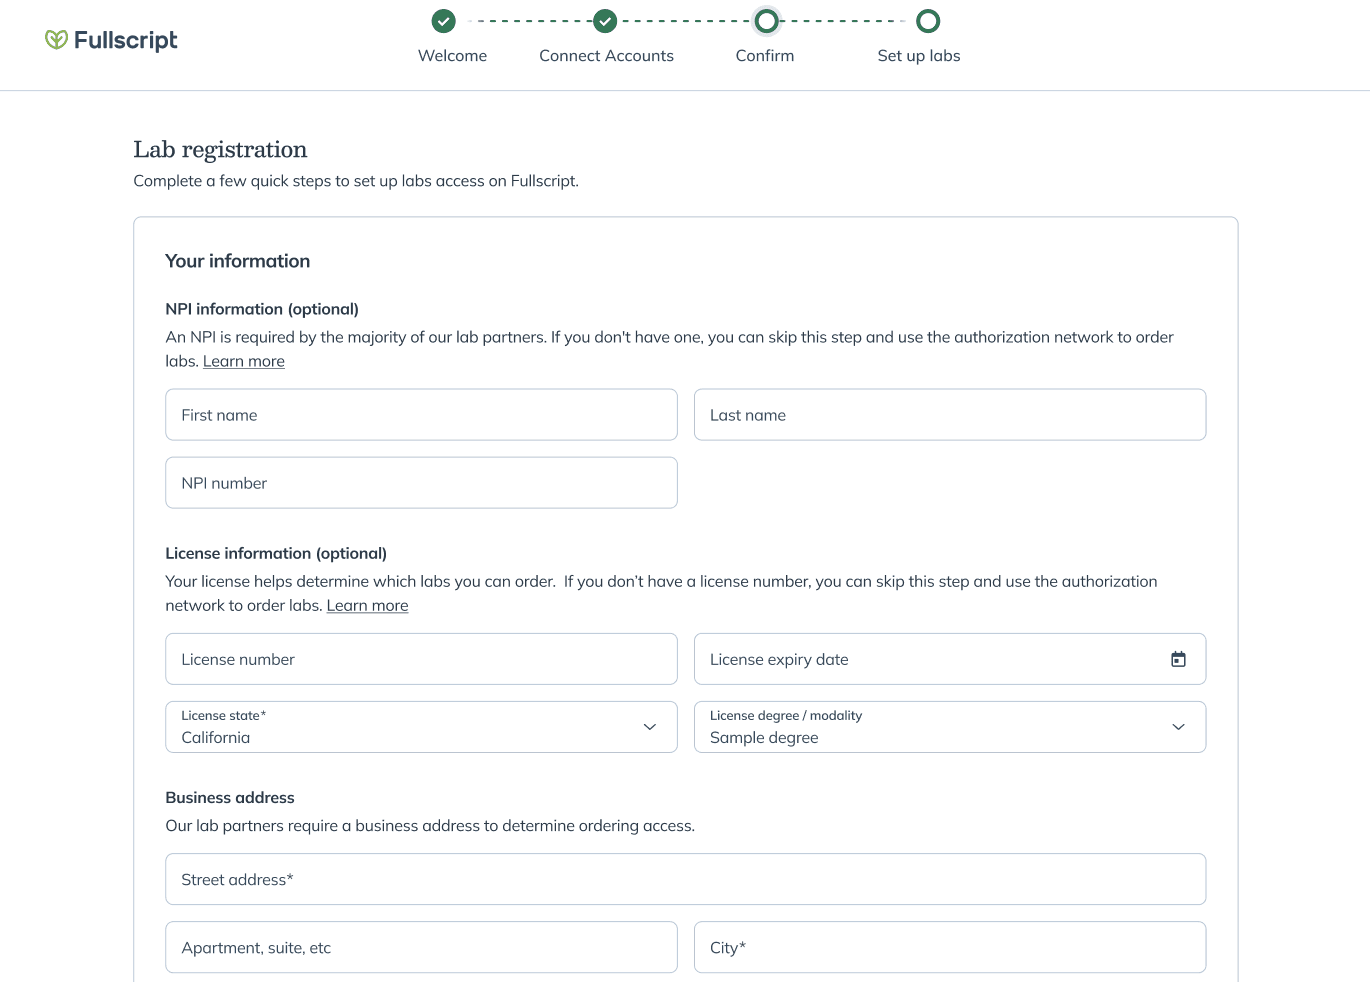
After matching any staff or patient accounts, you’ll complete a few final registration and account setup steps before entering Fullscript. Depending on your account and ordering access, some screens may vary.
- Review and confirm your account details.
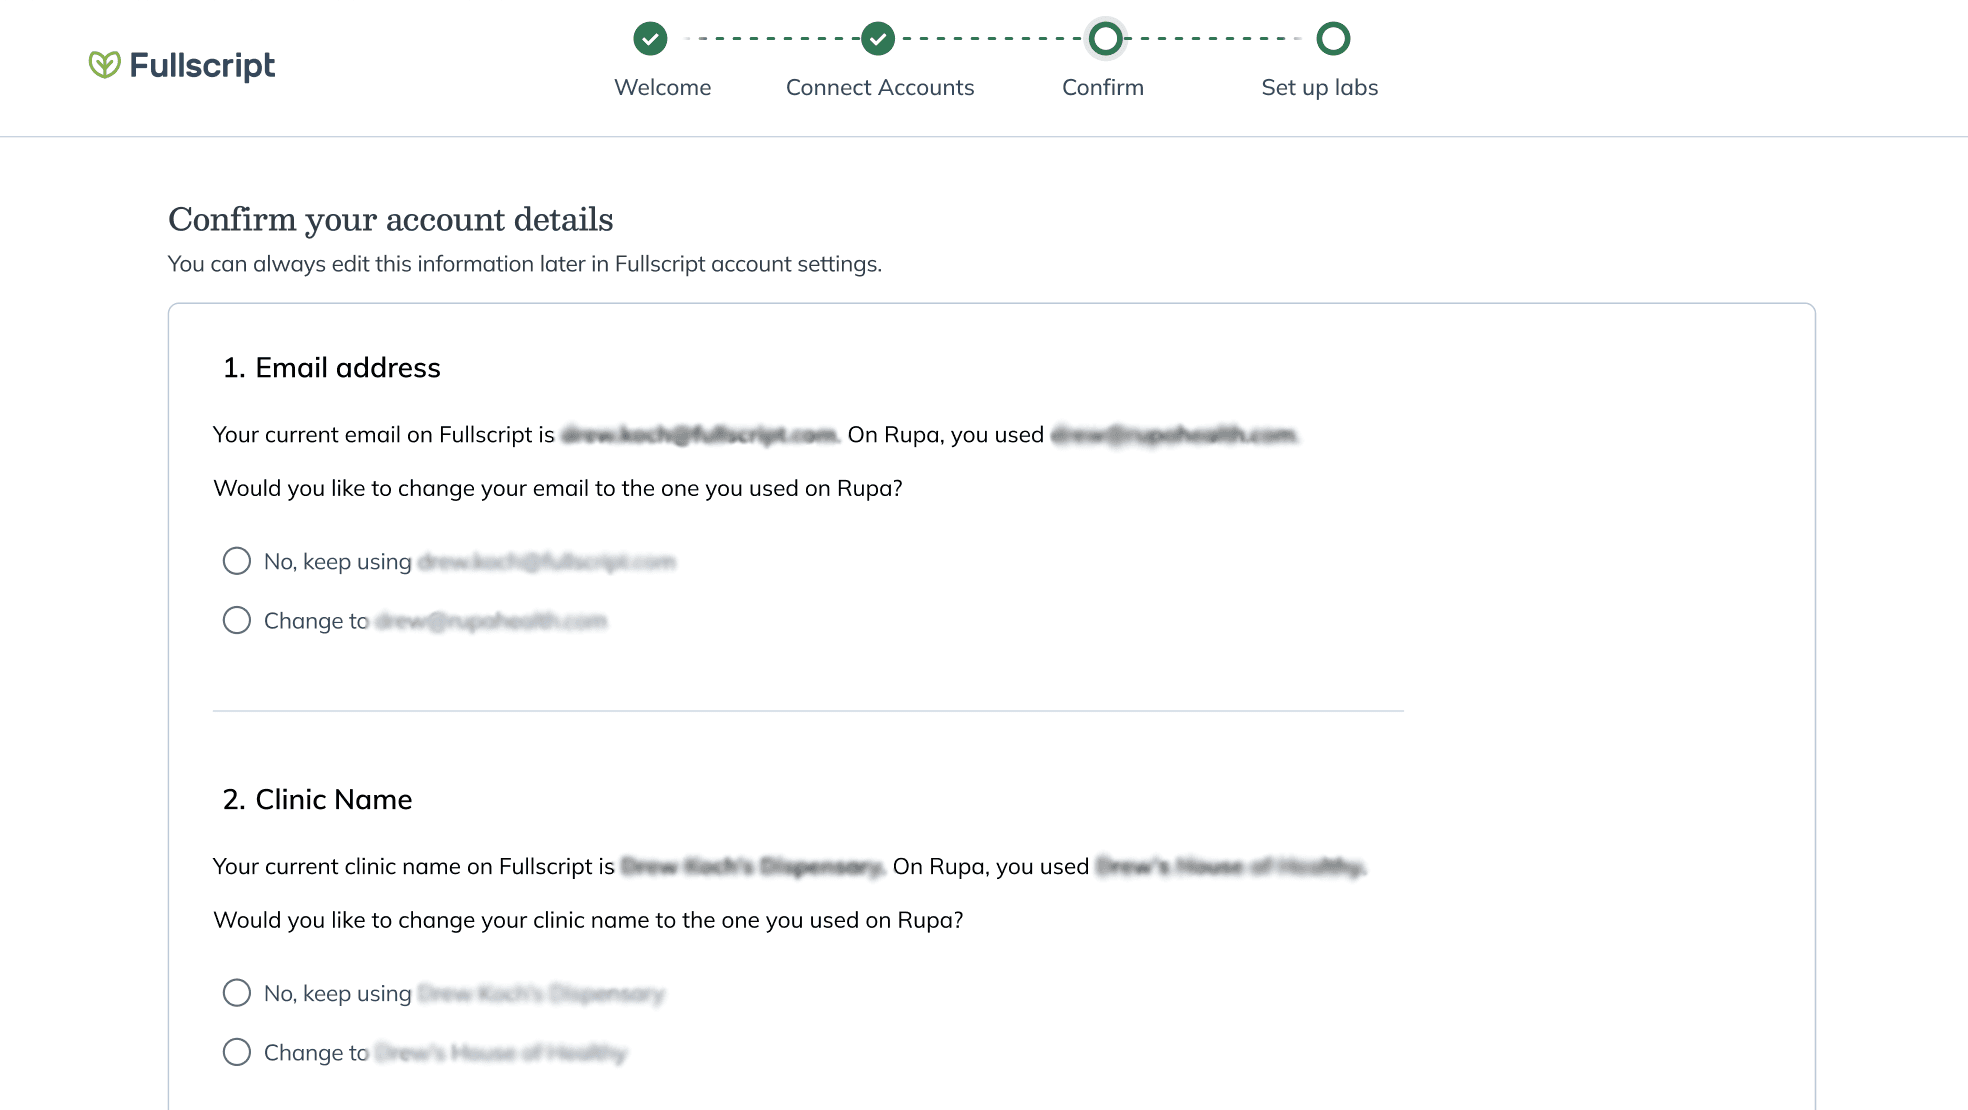
- Complete labs registration.
- If prompted, review your ordering access and authorization network settings.
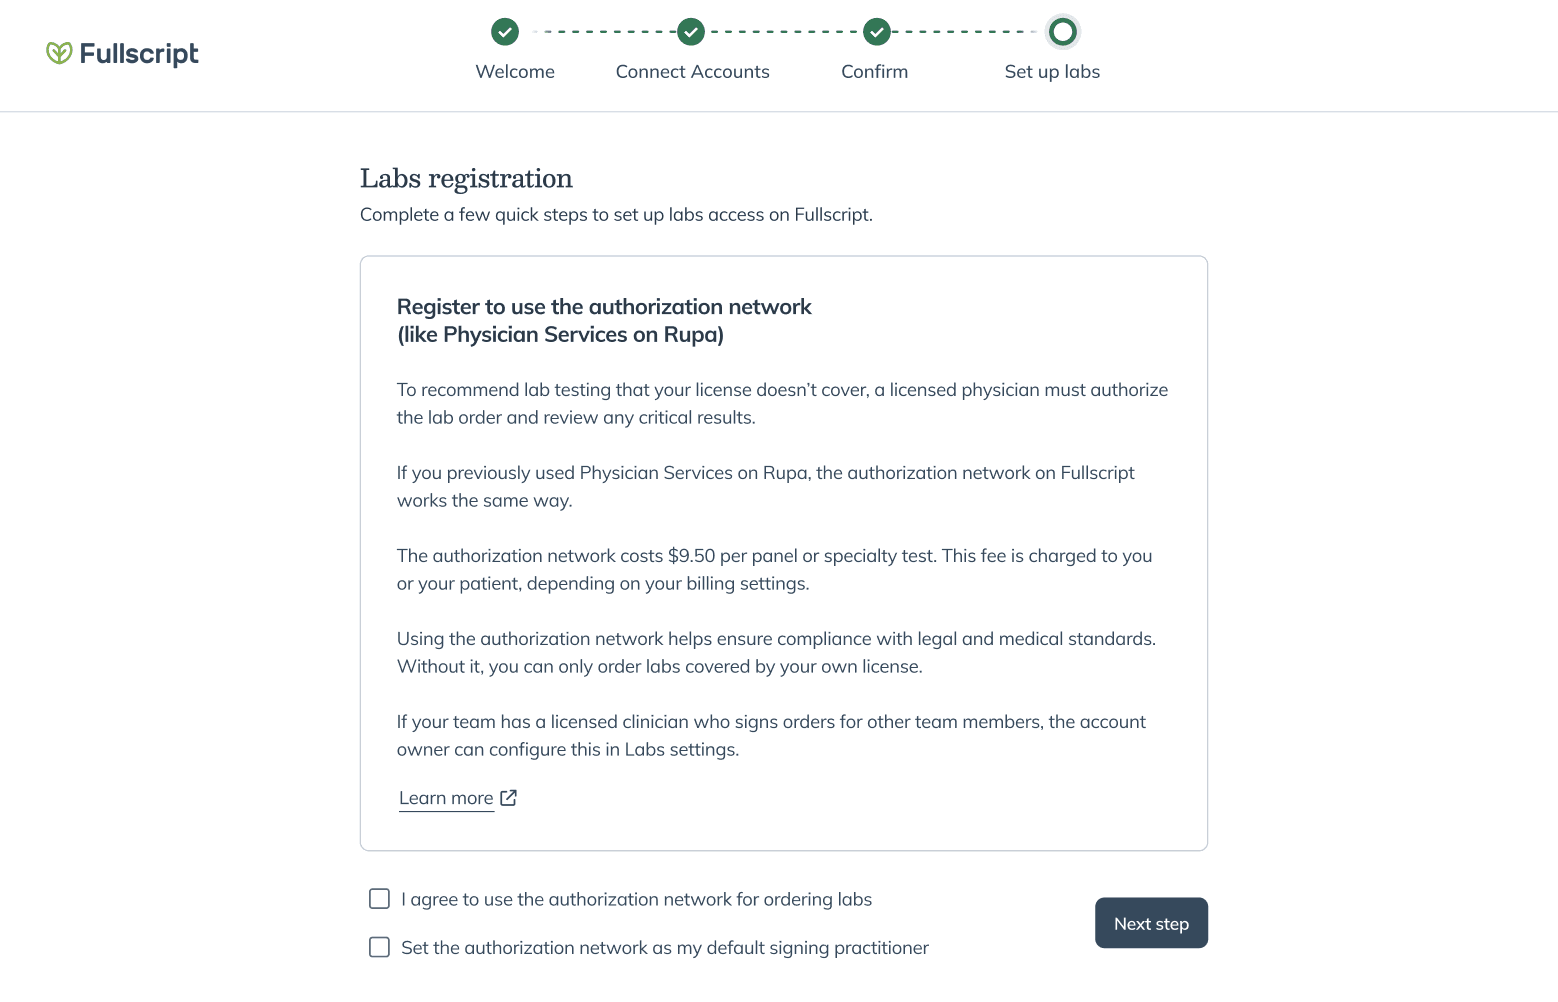
- Accept the Labs Terms of Service.
- Sign the Business Associate Agreement (BAA).
Once these steps are complete, you’ll be taken to Fullscript.
Finish setting up in Fullscript
After completing registration and account setup, you’ll arrive on a personalized Home page designed for practices moving from Rupa. This experience is available for 30 days after your move and helps you review imported data, learn key workflows, and complete any remaining setup tasks.
Take the guided tour
When you first arrive in Fullscript, you’ll see a welcome message with the option to start a guided tour.
The tour introduces the main areas of Fullscript and shows you where to find your Home page, lab orders, catalog, account settings, and tools for creating your first plan.
You can take the tour immediately or skip it and explore Fullscript on your own.
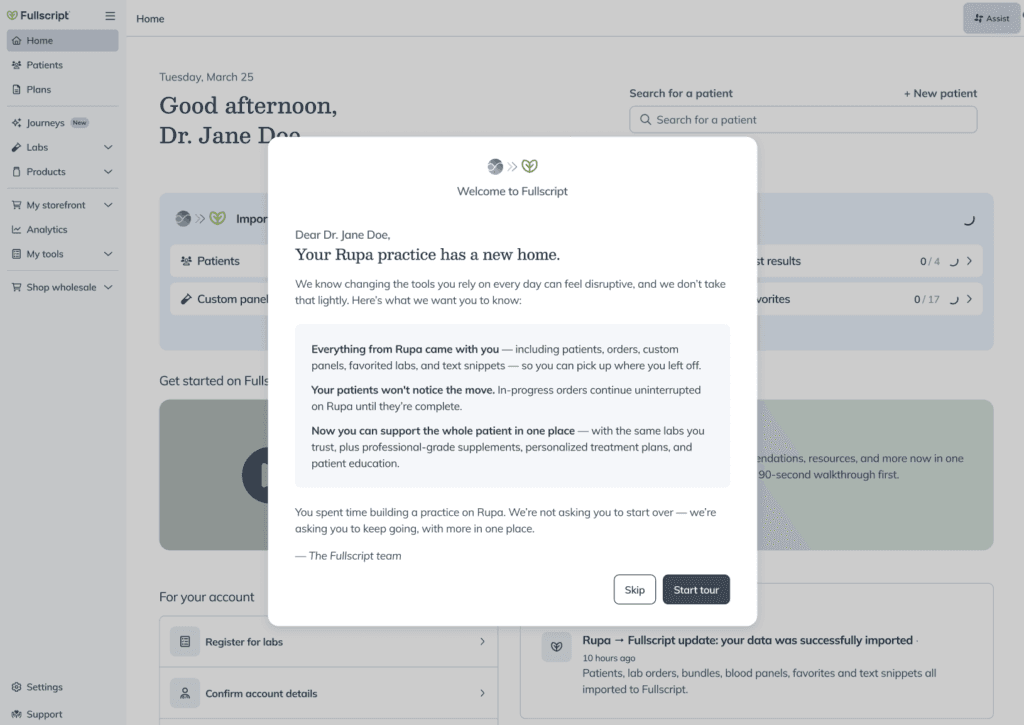
Welcome message introducing the guided tour in Fullscript.
Review imported data
As your information imports from Rupa, you’ll see progress directly on your Home page. Depending on your account, imported data may include patients, lab orders, test results, favorites, custom panels, and bundles or templates.
You can continue using Fullscript while your data imports in the background. Select any item to view imported records and track progress.
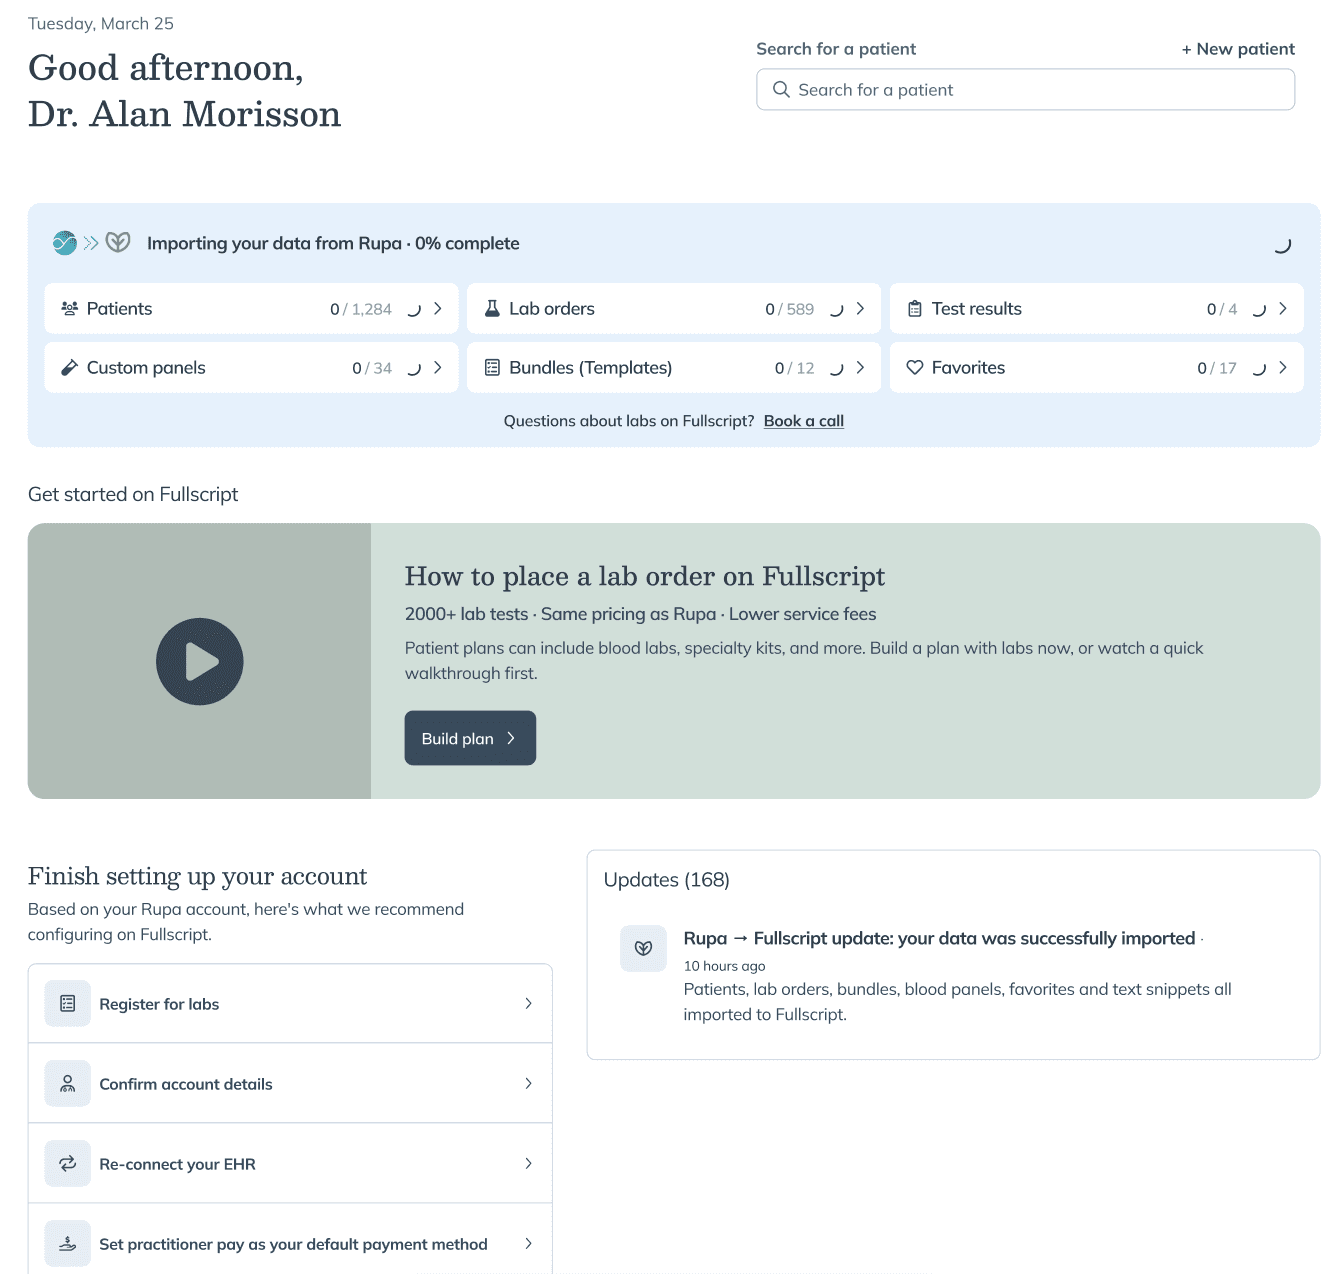
The personalized Home page shows imported Rupa data, onboarding resources, and recommended setup tasks.
Complete remaining setup tasks
Your Home page includes a personalized list of recommended setup tasks based on how your Rupa account was configured.
Depending on your account, you may see tasks such as:
- Reconnect your EHR
- Set practitioner pay as your default payment method
- Manage your clinic’s signing practitioner
- Set up a custom fee
- Order specialty kits for in-office use
Select any task to open the corresponding setup page in Fullscript.
Most practices won’t need to complete labs registration or account confirmation at this stage because these steps are now completed before entering Fullscript. If registration or account setup couldn’t be completed earlier, those tasks may appear here so you can finish them later.
Learn how to place a lab order on Fullscript
The Home page includes a short walkthrough video that introduces the Fullscript ordering workflow.
On Fullscript, lab orders are created as part of a plan, which can include labs, supplements, lifestyle recommendations, and resources in one place.
To get started, select Build a plan. You can begin immediately or complete the guided tour first.
As you get started with labs on Fullscript, you can also refer to the Getting started with Labs on Fullscript after moving from Rupa guide for additional guidance and tips.
Supporting your move to Fullscript
Our Customer Support team is here to help before, during, and after your move to Fullscript. Our team has experience with both Rupa and Fullscript and can support you through each step of the transition.
If you’re looking for additional guidance during your move, the following articles may help:
- Getting started with labs on Fullscript after moving from Rupa
- Selecting your account owner in Rupa
- Moving from Rupa to Fullscript: Lab ordering access and the authorization network
- Finding Rupa Health data in your provider account
- What it means to be view-only on Rupa
- Staff: Moving from Rupa to Fullscript
- Moving your Rupa account to Fullscript | Video
- Moving your multi-practitioner Rupa account to Fullscript | Video
You can also contact our team directly:
Email support: [email protected]
Phone support: 1-888-488-8153
Live chat support: Chat bubble ( ) on any Fullscript page.